Heyhey,
here are the final steps of the pants.
 pin the pants closed at the waistband
 place the button (I used an old one, my grandma gave me a box of buttons she collected;) I guess she cut them of the clothes she was throwing away)
 then you need a pin right in the middle of your button
 then place the button next to that pin and pin another one at the other side
 thats where your buttonhole is gonna be. I used tailors chalk to draw it on
 now sew a button hole only in the top layer (with your machine or by hand)
 cut it carefully open and test if the button really fits through
 then close the pants again and mark a point in the end of the buttonhole, thats where you gonna sew the button to the layer below
 looks pretty finished
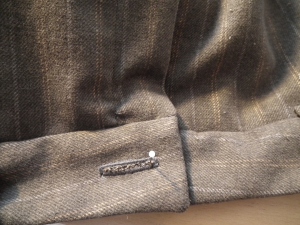
 last: the hem, use overedging and fold the hem allowance inside and sew with invisibles stitches by hand, if you pants are more sporty you can also fold the hem allownace twice and sew with straight stitching, I wanted it invisible, because it fitted the look better
 trara! I love to wear them, already working on new ones with the same pattern 😉
Are there any questions left? and dont forget to tell me what or who you wanna be at carnival.

Very Nice, and the button is also. Thanks for the tutorial from start to finished. Happy Sewing. Mtetar
glad you like it! 🙂
I love making pants. I finished a pair that I lined and made some alterations. But I haven’t done the closure yet. Now I’ve got a tute to help me!
Glad that I could help. Hope everything works the way you want 😉
Hello, I just wanted to let you know that I love your blog, and I am giving you an award. Please check it out here: http://lcartera.wordpress.com/2013/01/13/the-versatile-blogger-award/
thank you so much!
Your’e welcome, and you deserve it!