Heyhey,
now it happened again, my voice is gone 😉 somehow that happens every time I get a cold. I dont know why my vocal cords are so sensitive. Luckily I do not need to talk to blog, so here are the next steps for my camera bag. By the way, I got the pictures of my first developed films and I only totally ruined maybe 1 or 2 pictures per film, by not using the right amount of light. I am kind of proud most pictures look ok and a few even good. 🙂
 after cutting all pattern-parts twice I pinned and sewed the first seams at the inside-parts
 then I sewed the 2 lens-casings together, right side facing each other
 and turned the right side out
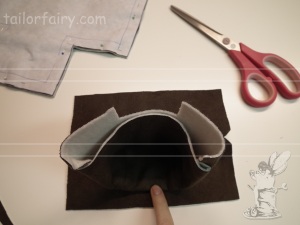
 now I sewed that onto the other inside part
 a test run
 checking if everything fits well together
 to sew the parts together I needed the marked lines of the seam allowances
 and then pinned and sewed the open ends of the lens casing to the inside-bag
well I hope this was helpful for you, let me know if you have any questions!
keep sewing and smiling
your TailorFairy

[…] here are the next steps for my camera bag. You can find the other parts here: part1 and part2. […]
[…] here are the next steps for the camera bag, the other parts are here: part1, part2 and […]
[…] are the last steps for my camera-bag, the other parts can be found here: part1, part2, part3 and […]